
How to Scan Physical Documents into Clean PDFs with Your Phone Camera
Don't have a bulky flatbed scanner? EditPDFKit's Doc Scanner Studio uses your smartphone camera or uploaded snapshot, automatically corrects 4-corner perspective distortion, enhances contrast with Magic Color, and exports clean, multi-page PDFs with zero watermarks.
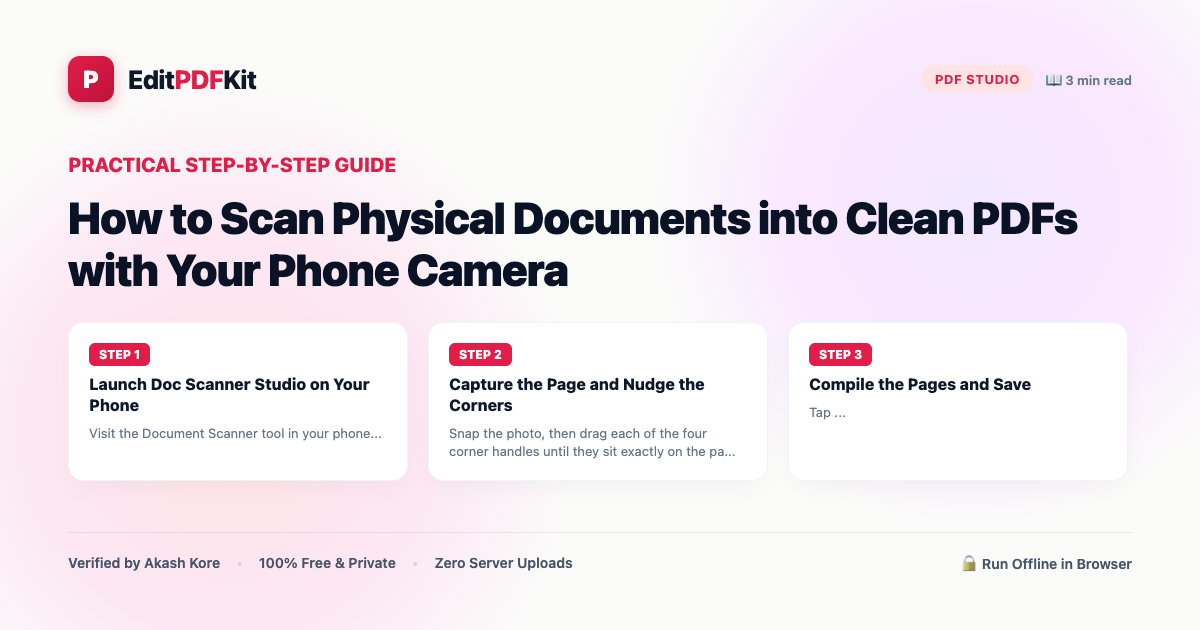
A standalone flatbed scanner is increasingly rare outside of offices, which leaves most people reaching for their phone camera to "scan" a receipt, contract, or handwritten note — but a raw camera photo of a document is not the same thing as a scan. It's taken at an angle (introducing perspective distortion where the paper looks like a trapezoid instead of a rectangle), it picks up ambient shadows and yellow-tinted lighting that a real scanner's flatbed glass and calibrated light source avoid, and it has none of the contrast enhancement that makes printed scans look crisp and uniformly white.
A proper document scanner app solves both halves of that problem: a perspective correction step that mathematically flattens the trapezoid-shaped photo back into a true rectangle, and a color enhancement filter that removes shadows and boosts contrast so the final result looks like an actual scan rather than a photo of a piece of paper.
Open Online Document Scanner now
Step by step
4 steps- 1
Launch Doc Scanner Studio on Your Phone
Visit the Document Scanner tool in your phone's browser, then tap 'Start Camera Scanner' or upload camera photos you've already taken.
Open Online Document Scanner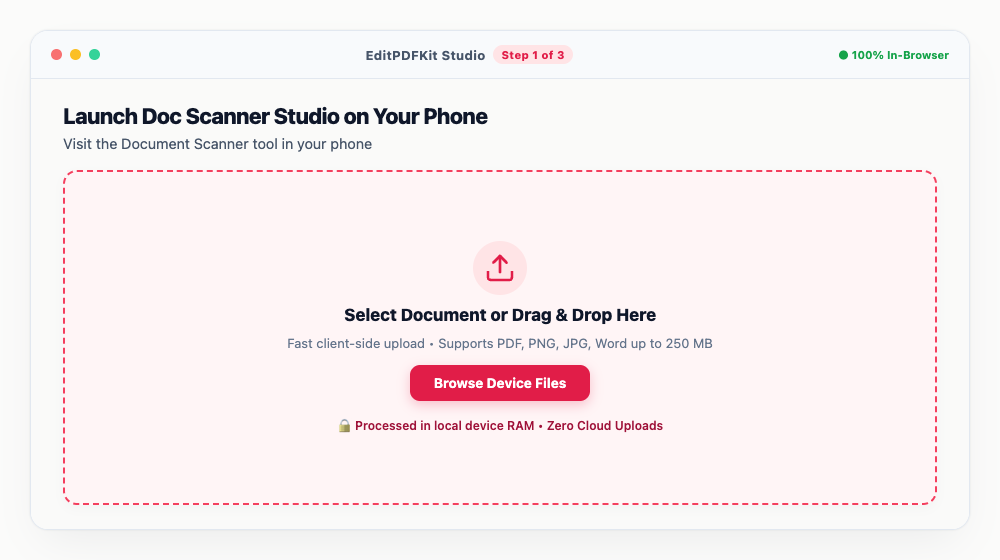
A dark desk under white paper (or any surface that contrasts with your document) makes the corner detection noticeably more reliable.
- 2
Capture the Page and Nudge the Corners
Snap the photo, then drag each of the four corner handles until they sit exactly on the paper's edges — the tool flattens the perspective from there automatically.
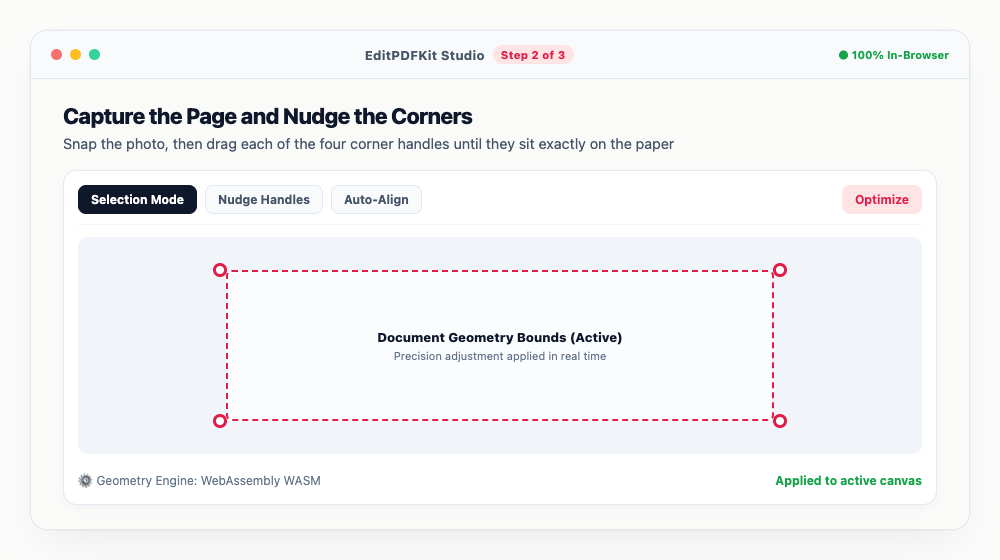
The midpoint handles along each edge, not just the corners, help when a receipt is creased or curling rather than lying perfectly flat.
- 3
Choose a Color or Black & White Enhancement
'Magic Color' lifts contrast while keeping stamps and colored logos intact; 'B&W Clean' pushes everything to crisp, photocopier-style black and white instead.
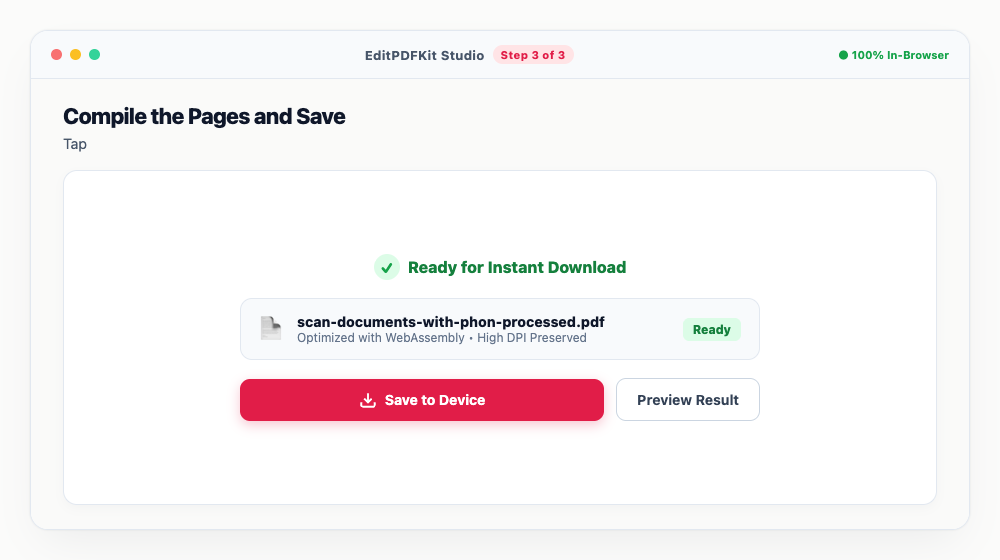
Going B&W trims file size noticeably — worth it if the PDF is headed straight into an email attachment.
- 4
Compile the Pages and Save
Tap 'Add Page' for each additional sheet, reorder if something's out of sequence, then 'Save PDF' to download the finished document.
The built-in OCR feature can pull text straight out of these scanned pages right after saving, no separate upload needed.
Why use EditPDFKit for this
- 4-Corner Perspective Deskew: straightens angled photographs of documents onto a flat plane
- Magic Color & B&W enhancement filters: boosts text sharpness and removes shadows
- Multi-page document scanner: snap multiple pages and compile into a single organized PDF
- 100% Free & No App Download Required: works in your mobile web browser without subscription popups
What Is Scanning a Document With a Phone Camera?
Scanning a document with a phone camera means turning a raw photo of a piece of paper into something that actually looks like a flatbed scan — flat, correctly rectangular, evenly lit, and high-contrast — rather than a tilted, shadowed photo of a document lying on a desk. A camera photo taken at an angle captures perspective distortion (the paper looks like a trapezoid, not a rectangle) and picks up ambient shadows and yellow-tinted lighting that a real scanner's glass and calibrated light avoid entirely.
Proper document scanning solves both: a perspective correction step that mathematically flattens the trapezoid back into a true rectangle, and a color enhancement filter that removes shadows and boosts contrast so the result reads as a genuine scan.
Who This Is Built For
Students scanning homework, small business owners filing receipts, and mobile professionals all need this specifically because a flatbed scanner isn't within reach when the need comes up. A student needs to submit a handwritten assignment as a clean PDF without access to a scanner in their dorm room. A small business owner filing receipts for expense tracking needs them legible and properly oriented, not a sideways photo with half the table visible in the frame.
A mobile professional signing and returning a contract while traveling needs to digitize a physical signature page on the spot, from wherever they happen to be, with no office equipment nearby. In every case, the phone already in their pocket is the only realistic scanning tool available.
The Tools That Do the Work
4-Corner Perspective Deskew straightens an angled photograph back onto a flat plane by mathematically warping the four corners you mark into a true rectangle — effectively un-skewing the photo as if it had been shot from directly overhead. Magic Color and Black & White enhancement filters remove shadows and boost text sharpness, turning a dim desk photo into something that looks printed.
The multi-page scanner lets you snap several pages in sequence and compile them into one organized PDF, and because it works entirely in your phone's mobile browser, there's no app download, no subscription popup, and no storage overhead on your device.
What Makes This Quick
Scanning is four steps: launch the scanner on your phone, capture the page and nudge the corner handles onto the paper's edges, pick a color or black-and-white filter, then compile and save. There's nothing to install from an app store and no account to create — it runs directly in Safari, Chrome, or whatever mobile browser you already have open.
Because the corner-correction and filtering happen automatically once you've marked the edges, you don't need any photography skill to get a clean result — even a slightly crooked, shadowed initial photo comes out looking like a proper scan.
Frequently asked questions
Do I need to install an app from the App Store or Google Play?
No. EditPDFKit runs directly in Safari, Chrome, Edge, and Firefox on your phone with zero app installations, storage overhead, or subscription popups.
Does the scanner put 'Scanned with CamScanner' watermarks on my files?
Never. EditPDFKit is strictly watermark-free. Your output PDF or photos are 100% clean, professional, and unbranded.
How does edge straightening and shadow removal work?
When you take an angled photo on a desk, our 4-corner perspective crop tool lets you adjust the corners to square the document automatically. The Magic Color filter removes shadows and yellow glare, making paper crisp white and text dark.
Can I scan multiple pages consecutively into one document?
Yes! Use the multi-page viewfinder to snap consecutive pages with thumb controls. You can easily reorder pages, rotate upside-down sheets, and compile them into a neat multi-page PDF.
Can I export my scanned pages as separate photos in a ZIP file?
Yes! Doc Scanner Studio offers dual export: tap 'Save PDF' to generate a consolidated multi-page document, or tap 'Save ZIP (Images)' to download all scanned pages as high-resolution JPG photos inside a ZIP archive.
Are my sensitive certificates, ID cards, and receipts uploaded to cloud servers?
Never. All camera streams, document enhancement filters, and PDF compilation run 100% locally on your phone using HTML5 Canvas and client-side WebAssembly. Total privacy is guaranteed.
Do I need to install any software to scan physical documents into clean pdfs with your phone camera?
No installation needed — the full process — scan physical documents into clean pdfs with your phone camera — runs directly inside your web browser using our scan document tool, powered by WebAssembly. Skip the account creation and extension install — it just works in the tab you have open.
Is this approach suitable for students scanning homework?
Yes — this covers a real need for students scanning homework, small business owners filing receipts, and mobile professionals. Desktop, Android, or iOS — the process is the same, and your file never leaves the device.
My scanned page has a shadow down one side — can I fix that?
Apply the 'Magic Color' or 'B&W Clean' filter — it normalizes uneven lighting and shadow gradients across the page in addition to whitening the paper background, which usually clears up one-sided shadows cast by a desk lamp or a window.
Can I rescan just one page if I made a mistake, without starting over?
Yes. Each captured page is a separate thumbnail in the multi-page queue — delete the bad one and recapture only that page before exporting, rather than redoing the entire batch.
A phone camera can genuinely replace a flatbed scanner for most everyday document digitization, but only once the perspective distortion and lighting issues of a raw photo are corrected — which is exactly what the 4-corner deskew and color enhancement steps are built to automate. Open the Scan Document tool next time you need to turn a stack of paper receipts, forms, or notes into a clean, properly-oriented PDF using nothing but your phone's camera.
Pairs well with
Bates Numbering
Burn a prefixed, zero-padded number like DOC-00001 into a corner of every page, one increment per page.
Compare Two PDFs
Extract the text from an original and a revised PDF and read the line-by-line differences in one highlighted stream.
Compress PDF to 100KB
Reduce PDF file sizes under 100KB for government portals, exams, and job applications.
Related posts
OCR & Text Extraction
How to Extract Text and Tables from Scanned PDFs with Free OCR
Format Conversion
How to Convert iPhone HEIC and JPG Photos to PDF Documents
Mobile Scanning
How to Scan Documents to PDF with Your Phone Without Watermarks or CamScanner
Study Notes Scanner
How to Convert Handwritten Study Notes and Book Pages into Clean White PDFs
PDF Rotation & Organization
How to Rotate Upside-Down Scanned PDF Pages Permanently (Without Adobe Acrobat)